Tag Archives: wreck

WRECK IT WEDNESDAY!!! (Issue No. 9)

7 Jan

Welcome back people!! So happy to see you made it to Wednesday!

Last week I promised that I would deliver a post on building an outdoor movie screen. To celebrate my 31st birthday, I decided that having a movie night in our backyard was an awesome idea. And it was. It would have been better if it hadn’t been in the high 20s temperature-wise…and having been pouring rain for a few days prior. I was picturing a fire pit, s’mores, jiffy pop popcorn (you know, the kind that comes in the package that looks like a pit tin with a handle you heat in a camp fire?) hot chocolate, the works. Between the weather and a smaller-than-hoped-for bank account, well, let’s just say things didn’t go quite as planned.

Fear not, I do have a nice little wreck it planned for you today. It’s just not the movie screen. We cheated on the screen. We simply took our staple gun and stapled a tarp to our wooden fence…then stapled a white sheet on top of it. You people are too smart to require a tutorial on how to do that. The tarp is to block out the light, the white sheet is so that the colors appear nice and bright. Easy peasy. I had plans to build a legitimate, free-standing movie screen. Perhaps when the weather gets better I can actually deliver the tutorial on that.

For now, I hope you will be satisfied with a Wreck It Wednesday on how to build a fire pit. My Handsome (and my Braun, since he’s the one that did all the work) says this Wreck should be called “How To Dig A Fire Pit In Your Back Yard So That Your Landlord Doesn’t Find Out”. So here we go:

IMG_1853

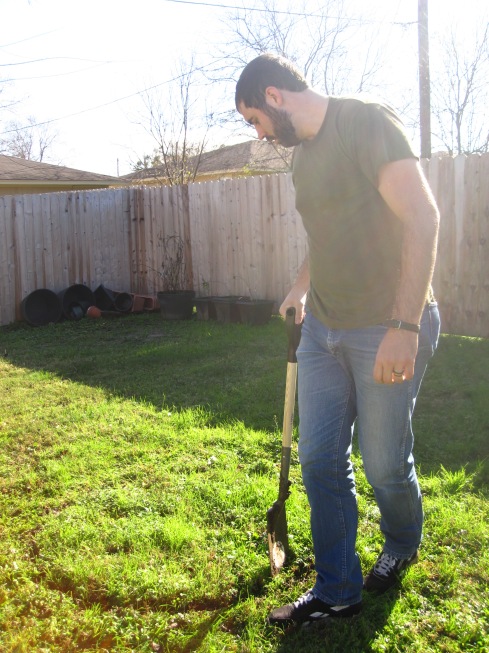
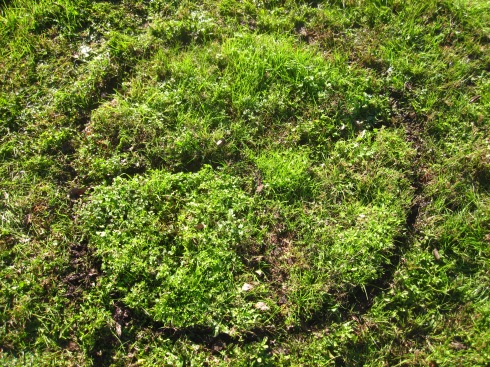
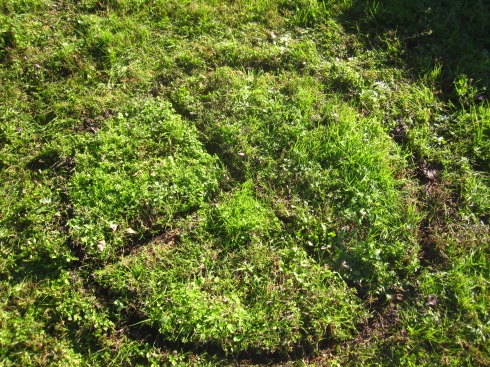
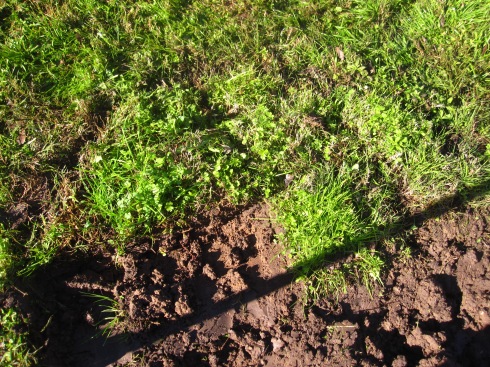
With a shovel of your choosing (according to the Handsome, flat shovels work best, but if you’re poor like us, whatever you have on hand will do the trick), make an outline of the shape and size of pit you want. All you have to do to accomplish this, push the spade of the shovel straight into the ground and pull it out. Keep making these cuts until you have the shape you’re looking for.

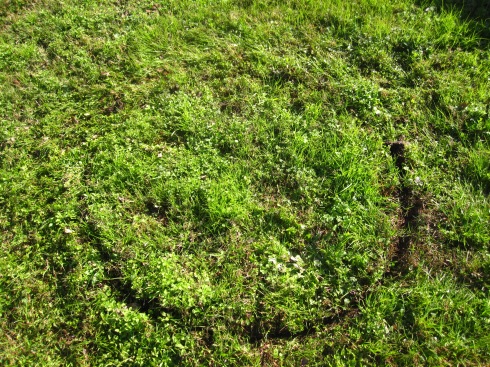
IMG_1848

Like so.

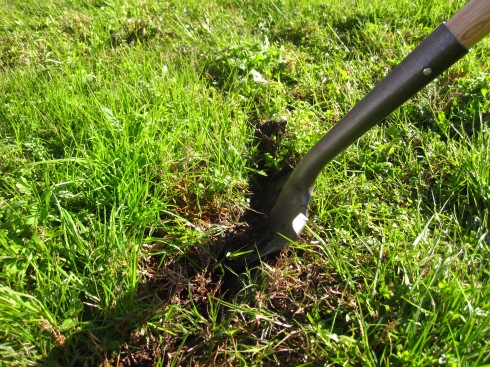
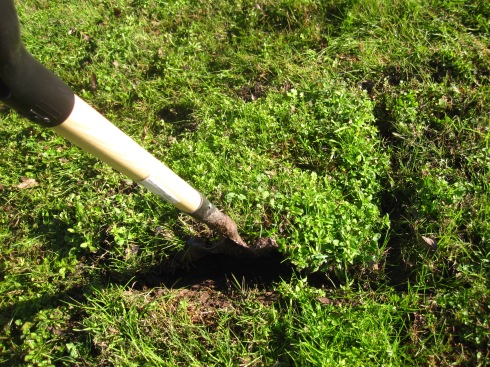
Next, you’re going to work your shovel under the grass, and kind of lift upwards to loosen it.

IMG_1849

Like so.

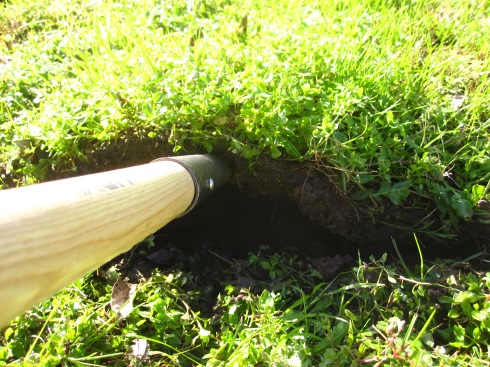
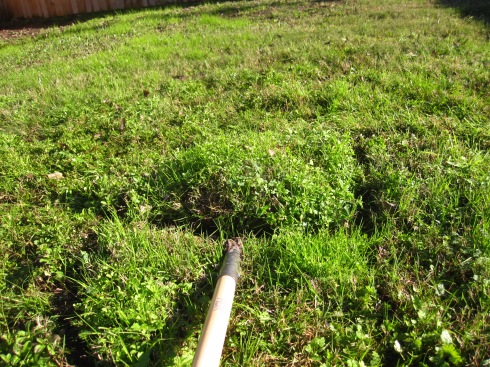
IMG_1850

Handsome discovered that it would be pretty near impossible to get the grass up in one piece, so he cut the grass into smaller pieces.

Like so.

IMG_1855

IMG_1856

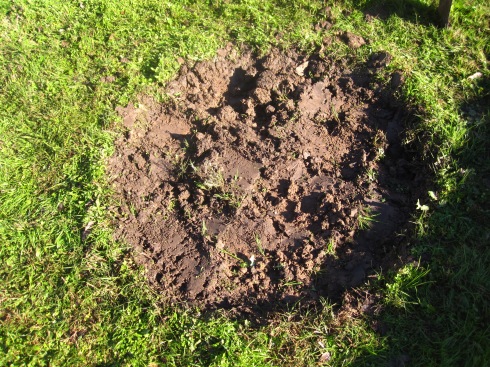
Next, work the shovel under the parts closer to the center. Ultimately, you need to get the grass completely released from the ground beneath it.

IMG_1857

IMG_1858

Once the pieces are loose, you can start lifting them out of the pit you’re building.

IMG_1859

We set the pieces of grass aside because we intend to replace it once we’re done. You can do whatever you’d like with your grass, I’m not your boss or your landlord.

Now that all the grass is out, you can start making the pit deeper. Now, the depth is completely up to you. Again, not your boss. Honestly it will depend on how fancy you’re looking to make your pit. We were on a shoestring budget, so we didn’t get any super cool stones or bricks to line and fancify ours.

Here are some pretty cool ideas from around the interwebs:

LauraCatherine.com

Shelterness.com

Houselogic.com

ThisOldHouse.com

IMG_1860

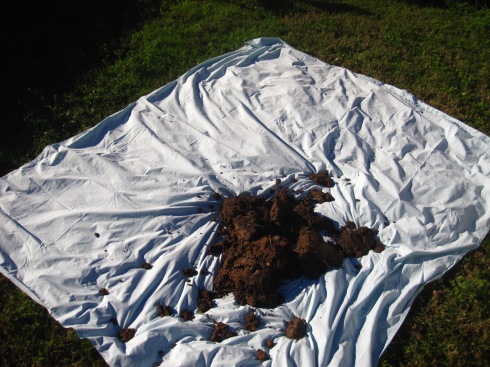
Handsome just dug and dug. Too bad our niece Chloe refused to teach us how to do the Duggie. This might have been easier. Just as we set the grass aside, we set the dirt aside as well. (Placing it on an old sheet just will make it easier to fill the hole back in.)

IMG_1861

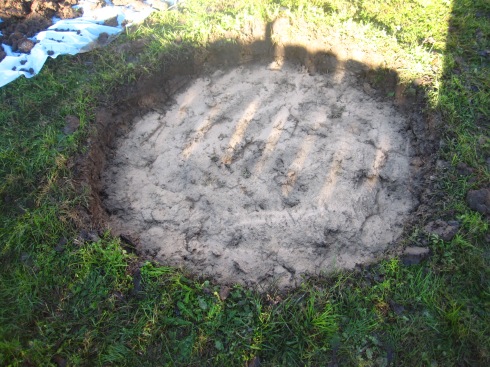
Here, you see the pit is complete. It isn’t very deep, but it suits our purposes just fine. The ground was extremely soggy from all the rain, so it was necessary to line the pit with a layer of sand. (We found bags of “play sand” at our local Home Depot. It was actually very inexpensive at about $3.50 a bag. We only used half a bag, since again, this fire pit is not going to be a permanent fixture in our back yard. It’s not our back yard, after all.

IMG_1862

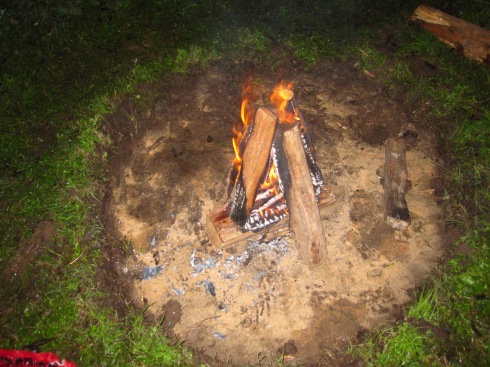
Here is the finished pit with the fire and all. That’ll do, Handsome. That’ll do.

IMG_1863

Now, hindsight is always 20/20. Considering that, Handsome has a piece of advice for you good people:

If you’re going to dig it much deeper than ours (about 6 inches) make sure that the edges are dug straight. If they are not, the edges will collapse on itself, meaning the hole will fill itself in, and you might end up with a bigger hole than you anticipated.

Now, if you are planning on doing this project and you have a little extra money in your pocket, you may want to consider buying some rocks to scatter on top of the layer of sand. This will keep your firewood dryer if there’s any moisture in the pit from recent rainfall by elevating it from the ground. Also, bricks, whether plain or ornamental, to line the inside edges of the pit would be a good idea. This will help reinforce the edges and keep it from collapsing on itself.

Anyway, this is our humble fire fit. It’s not the prettiest, but it served it’s purpose well. We can’t wait to have our own home to be able to make cool updates like these permanent. Well Folks, that’s all for this week’s Wreck. Hope it inspired you to do something creative!

XOXOXO

E

WRECK IT WEDNESDAY!!! (Issue No. 8)

27 Feb

Welcome, welcome, welcome! Here we are again, my friends, another Wreck it Wednesday. I figure the little traditions that I began not so long ago here on this blog need to be resuscitated. So here I am, attempting to breathe new life into Wednesdays.

In case you lovely people need a refresher on what a Wreck is. A Wreck is when we chat about ways to turn your life upside down. Shake up all those ideas you have about how you’re supposed to live, how you’re supposed to look at the world. Society seems to have rules for everything. But there’s not one person on this planet that should tell you how to live your life. You do not have any obligation to live up to anyone’s expectations or ideals.

Sure, it’d be nice to stroll into Lowes or Home Depot and pick up all the things your heart desires to make your home into that image of perfection from all those magazines and websites you’ve been pouring over. But who has the money these days? An even better question is this: Why in the hell would you want to make your space into an image out of someone else’s imagination?

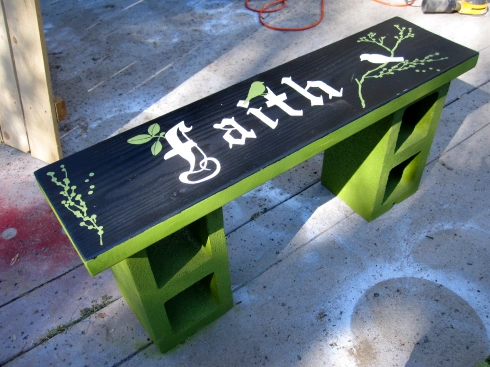
My best friend wanted a fire pit to add to her new backyard addition. Incidentally, she also wanted the brick planter dismantled. So here’s what I did…


Some used/recycled bricks, cheap wood, a few cinder blocks, some spray paint and a little acrylic craft paint…and there you go. A fully functional and entirely customized fire pit, complete with benches. It absolutely doesn’t line up with all those beautiful images I always see on Pinterest and on the magazine racks. Nevertheless, it’s perfect. I wouldn’t want it any other way. Besides, those words painted on the benches pretty much describe the whole reason the fire pit was wanted anyway. To inspire relationships, life, love, faith, happiness and laughter.

That’s what it’s all about, kids. Hope you enjoyed today’s Wreck.

WRECK IT WEDNESDAY!!! (Issue No. 6)

11 Apr

Welcome to Wreck It Wednesday! This is where I show you that breaking free of the way you used to look at things can free your spirit and open up all new possibilities. Today, we’re gonna talk letters. Not emails. Not text messages. Not skyping or leaving messages on Facebook walls. Hand-written, from the heart, letters.

No fancy paper...just a wire-bound book of notebook paper. It still makes me smile every time I read it.

Staring at a blank piece of paper may induce panic attacks in some, sure. But I know that amidst all of the junk mail and bills, we all secretly (or maybe not so secretly) adore getting real people mail. There’s nothing quite like seeing your name and address, hand-written across the front of an envelope. We inspect it and wonder what’s inside. It’s a wonderful experience. It tells us that someone cares about us and took a few minutes out of their busy day to let us know that we were on their mind.

It makes me infinitely sad to think that we don’t physically write much anymore. As a matter of fact, I know a lot of people who don’t know how to write or sign their name in cursive. The problem I see with all the technology we have going on these days, is that we’re always go go go. We need a faster, more efficient way of doing every imaginable task. The problem with all this multi-tasking, we miss a lot of details. Take writing an email for example. You have your account open, typing an email–but what’s that in the background on your desk top? Oh, your Facebook account is up, so is the website for your bank account, and who knows what else. A little bit of meaning is taken away when you don’t give tasks your full attention. Your friends and family deserve that attention, right? Well, get out that paper and your favorite writing implement so we can get started.

Remember in school, all the different ways we came up with to fold notes? ahhhh...the good ole days.

 Letters don’t need to be beautiful, well thought out prose to be  handed down through generations. They don’t need to be on nice stationary, or written in pen. They don’t even need to be letters at all. As a matter of fact, I regularly write notes here and there for various reasons, and sometimes no reason at all, other than to let someone know I’m thinking of them. I also regularly use markers, crayon and even stickers.

So now that you’re ready to begin, how do you begin? Well, how would you start a conversation with the person if you were speaking face to face? You can start your letter with: “So I was walking down the street the other day, and I saw a poster of a girl holding a puppy that reminded of you…” Heck, you don’t even have to write any words at all–draw a picture. Don’t worry so much about what you think a letter should look like. This is Wreck It Wednesday! A letter is supposed to look like whatever it ends up looking like when you’re done writing or drawing on the paper. Whoever you’re writing it for isn’t going to take a look at the letter and throw it back in your face because they find it unsatisfactory. (As a side note, if they do actually throw it back in your face, you should give serious consideration to removing that person from your list of friends.) They are going to feel happiness because you took a minute to let them know you took a little time out of your busy day for them. Stop letting the fear of not being “good enough” keep you from doing things.

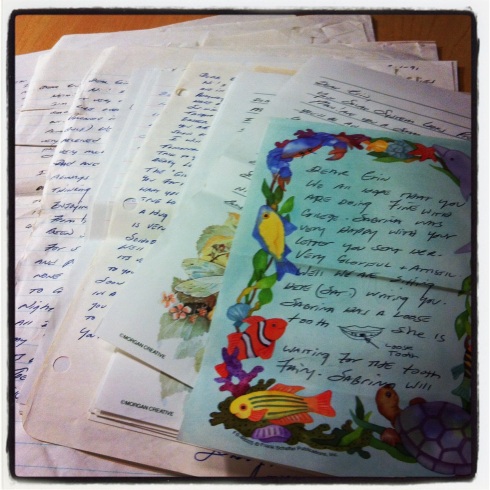
These are letters that my daddy wrote me while he was on deployment. They were written in 1991, and I still have them. That's how much they mean to me.

This is my favorite letter. My daddy was a great artist, and was kinda goofy.

We put a lot of unnecessary pressure on ourselves.  We feel as though we have to behave a certain way or have or do certain things to be accepted, to give meaning to our lives. That’s hogwash. Be yourself and live your life mindfully without letting outside judgement hinder your happiness. That’s how you put meaning in your life. Dr. Seuss once said, “Why fit in when you were born to stand out?” The man may have been crazy, but his words are fact. And incidentally, it’s why I started wrecking Wednesdays. Sure, my life may be a proverbial train wreck, but it’s mine and it makes me happy. Sure, people can’t take their eyes off it, but such is the life of a wreck. 🙂

WRECK IT WEDNESDAY!!! (Issue No. 5)

28 Mar

Last week, I told you guys we’re leavin’ the kitchen for the next Wreck. Well, guess what? Today is the next Wreck and I made it all the way to the dining table! Huge move, I know. What can I say? I have a small apartment, and therefore no more studio to be creative in. So I set up camp wherever the mood strikes me. Such is life.

Back to today’s Wreck: I have wood floors. While I do enjoy sliding down my hall in my socks, there are plenty of times that I wish I were a little kid so I can buy a pair of those super awesome non-skiddy socks. Yes, some of my wonderful family and friends might point out that my feet are small enough to fit into kids socks….that’s not the point. I am a big girl, and as such, I want to wear big girl non-skiddy socks. 

Today, we’re going to toss out that silly notion that we can only have non-skiddy socks if they sell them at the store. You have socks in your drawer, right? Well, all you need besides socks is puffy paint (3 dimensional fabric paint). Observe: 

Socks. Note that I did not go out and purchase brand new socks for this occasion. (as evidenced by the perma-stains on the bottoms, no doubt from all the hall sliding I mentioned earlier)


Paint. This is my puffy paint collection. It’s marvelous, I know. Don’t be jealous. If you’re not hoarding art and craft supplies like you’re preparing for a nuclear winter like me, you can find this stuff at your local craft store or Walmart. It’s worth mentioning that puffy paint is inexpensive. Depending on the store and brand, they typically run $.50-$1.00 per bottle. But with a 40% off coupon at Michaels, I paid 10 bucks for a pack of like 25. Don’t judge me.


Now that you have your socks and your paint, lay your socks out so that the soles are facing up….like so.


Now, we paint. I’m not gonna micromanage your creativity. I chose my turtle socks and decided to outline the shells.


We do not need to be a slave to the status quo. Stop worrying about what people are going to say about you, or about your new super awesome homemade non-skiddy socks. My dad once told me that “you shouldn’t spend so much time worrying about what other people think of you, because you’d be surprised at how little they actually do.” In the end, being successful has little, if anything to do with material wealth or possessions. Sure lots of money can certainly make living easier, to an extent. But accumulation of wealth and stuff is what traps us into doing the same old thing, just because it’s easy. In my opinion, success is to have created a life that is as unique as you are, one that puts a sparkle in your eye, and one you can be proud of. If you’re not excited about your life, then maybe it’s time to take stock and figure out what really brings happiness to your heart. If making really cool things that some people may not have even thought about makes you happy…then you and me, we’re cut from the same cloth…and Wreck It Wednesdays are just the ticket for a little inspiration.

Note: This would be an awesome little project to do with your children, if you have any. Also, I’d like to add that I’ve thought about making a couple of pairs for my dog…she loooooathes wood floors. Apparently she doesn’t share my affection for hall sliding. She doesn’t know what she’s missing.

WRECK IT WEDNESDAY!!! (Issue No. 4)

21 Mar

This one’s made in….New York City. ::::gasp!:::: NEW YORK CITY?!?! Remember those Pace Picante Sauce commercials with all the cowboys sitting around a campfire, about to have some delicious salsa, only to discover someone made a party foul and brought sauce made in New York?

No?

Hmm…well, regardlessly, this week’s Wreck is brought to you in part by my momma (because she taught me how to do this) and  also the hopes that I can coax you people out of your comfy routine of using the store-bought varieties for all your salsa needs. Sure, there are some pretty tasty ones out there, but today…WE ARE MAKING SALSA, PEOPLE!

I promise, it’s so simple, and your family and guests will be impressed at your worldly culinary prowess. :::wink:::

Lets get started. We are going to make a tomato-tomatillo salsa today. You could always use just one or the other, but this is my favorite combination because tomatillos give it a nice tang. And don’t you worry if you don’t know what a tomatillo looks like, I’ll teach you.

Now, I need you to cruise to your favorite market, and head straight to the produce:

1. Tomatoes. You could use any variety you want, but I prefer the smaller ones on the vine, or even roma tomatoes. The smaller ones tend to be about the same size as the tomatillos…which makes the cooking process easier because they’ll need the same amount of time. You will need about 5 tomatoes.


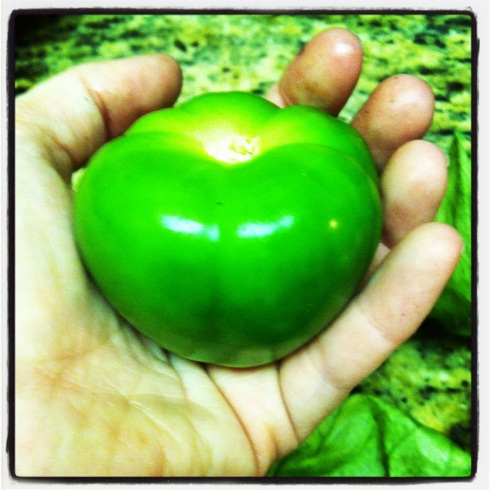
2. Tomatillos. Remember I told you I would teach you? Well you can’t say I lied. This is what they look like. Underneath that husk, they like very much like green tomatoes. Try to pick ones with husks intact. Just like other produce, avoid the ones that look wrinkly, bruised or pitted. Also, You’re going to want ones that are similar (exactness isn’t that important, just more convenient) in size to your tomatoes. You will need about 5-7, depending on the size. I try for a 1:1 tomato to tomatillo ratio. Like I said about exactness just a second ago, it’s not important. Having more or less of one or the other will not ruin this recipe.


3. Serrano chili peppers. Don’t be scurred, this salsa is not meant to scar your taste buds so they never trust you again…I promise. Serranos look a lot like jalapeno’s slimmer, taller cousin with better taste. I would like you to pick out the 4 prettiest ones you can find. Just like I said about the tomatillos, you’ll want to avoid any that appear wrinkled, bruised or pitted.


4. Cilantro. No, you cannot substitute with parsley or any other herb for that matter. I don’t know what the heck chef’s are thinking when they write a recipe and say they this herb can be substituted with something else. It’s a completely different herb, with a completely different flavor. It’d be like telling someone that it’s fine to substitute sugar for salt. It just doesn’t make sense. I digress. I need you to choose 1 bunch of cilantro. Again, the prettiest one you can find, avoiding ones that are wilted or bruised.


That about does it for the market…let’s take it back to the house…

At home, you will need the following:

4. A medium pot.

5. Water.

6. A blender.

7. Salt.

8. A big soup spoon.

9. A fork.

That’s it. That’s all you need. Now doesn’t all that wonderful produce you just bought look lovely?


Okay, enough with the produce admiration. Let’s continue with our tomatillo lesson. This is what a single tomatillo looks like up close, in it’s husk. I’ve been told that I need to note that I have small little midget hands, so the tomatillo you’re looking at may appear larger than it really is. Consider this fact duly noted.

This is what the same tomatillo looks like naked. See, I told you it looks like a green tomato. Notice that the skin is smooth and shiny. That’s the way, uh huh, uh huh, I like it. Uh huh, uh huh.

This concludes your lesson in tomatillos for today. We will now return to your regularly scheduled Wreck…

Now, here is how you make the salsa:

1. Remove the husks from all tomatillos

2. Remove any stickers or stems that may have traveled along with your tomatoes.

3. Pull off the stems from your serrano chile peppers

4. Place your tomatoes, tomatillos and peppers in one medium pot, like so…


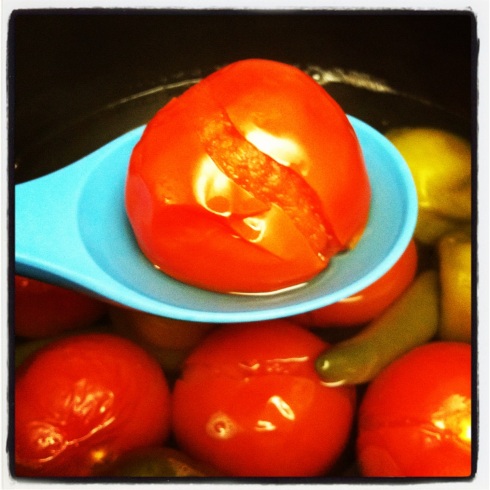
5. Fill the pot with water until the produce is just covered, and boil on high for about 15-20 minutes. What you’re looking for is the tomatillos to turn a dingy, split pea soup color and more importantly, you’re looking for the skin on your tomatoes to be peeling off, like so…


6. Now that your tomatoes are shedding their skin, grab the pitcher of your blender and set it next to your pot. With your big soup spoon, fish out one of your tomatoes. Now, using your fork, peel off and remove the skin from the tomato and discard. (I normally just drop it back into the pot…it’s not an issue, I promise.) When your tomato is properly naked, place it in the blender pitcher. Repeat for all of your tomatoes. No, you do not need to do the same for the tomatillos.


7. Fish out all of your tomatillos and place in the blender also.


8. Add ONE of your serrano peppers. Just one. Trust me. Spiciness can vary tremendously among individual peppers, so we play this one by ear. Try one, and if it’s not spicy enough, add another, and so on. If you’re feeling extra cautious, you could cut them in half and add them halves at a time.

9. Set your blender pitcher back on its base, put the lid on (this part is important…unless you prefer to wear your salsa or have been toying with the idea of painting your walls with salsa.) and pulse until it looks similar to this:


10. Now, like I mentioned before with the chile peppers, add one at a time. Pulse the blender in between additions, then taste. Here, you’re tasting for spiciness…you’ll be adding salt later.

11. Transfer the mixture to a medium mixing bowl.

12. Chop up your entire bunch of cilantro (just the leafy parts…we don’t want the stems) and stir into your salsa. You can play this by ear also…since I don’t know how big your tomatoes are, I don’t know exactly how much salsa you’ll end up with. If you use the same size as me, I used pretty much the whole bunch and filled a quart-sized mason jar with salsa.

13. Season your salsa with salt to taste. My momma says that the salt can help tone down the heat. Momma don’t lie…not even when she’s not telling the truth. That’s called tricking. But that’s a whole ‘nother post. (Love you momma-I hope I made you smile. If I didn’t remember that I’m your baby and you love me. ;))

14. Enjoy. I like mine on just about everything..chips, eggs, tacos, burritos…

Please refrigerate this salsa. You don’t want critters growing in it. It should keep, stored in an airtight container for about a week or two.

I wouldn’t be able to tell you for sure, because it doens’t normally last much for than a couple days…I must have a salsa-loving mouse in my fridge because it disappears…

I hope that you enojyed this week’s Wreck. Lord knows I enjoyed blowing your mind, teaching you that salsa comes from your kitchen and not a jar.

Next week, we leave the kitchen. Guess where we’re going next?? Stay tuned to find out!

WRECK IT WEDNESDAY!! (Issue No. 3)

14 Mar

So in last week’s Wreck, I promised bacon, so bacon you shall have. It has come to my attention (mostly because up until about a month ago, I was one of these people) that there are FAR too many people that cook their bacon in a pan on the stove.

Well boys and girls, today is the day we wreck that bacon-cooking rut of yours. Sure, your mom probably taught you how to cook bacon, and I’m sure she is a very lovely and sweet well-meaning woman with a sparkling personality such as mine. But I have a dream. I have a dreeeeeeam that one day, our sisters and brothers will no longer sully their pans and their stoves with all that bacon grease and slave over the sink scrubbing their bacon-cooking pans… I’m going to show you the light. Today, you will cook those strips of greasy deliciousness in the oven. Trust me, you’ll thank me later. (pssst…you can tell your mom you made it on the stove if it makes you feel better…but if you’re not a liar liar pants on fire, maybe you can show her this nifty little gem of bacon-cooking innovation)

Here’s what you need for this week’s lesson:

1. Bacon (if I had to tell you this one, them maybe you should stop reading here)

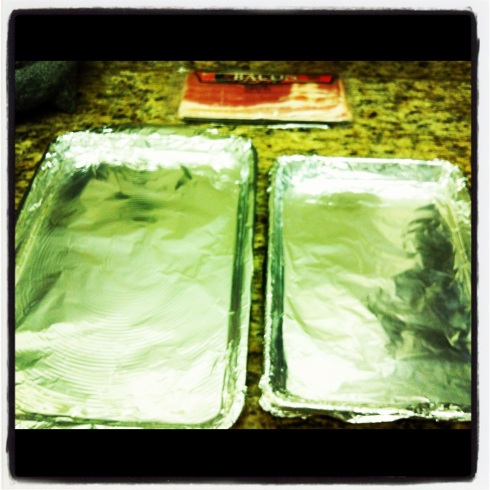
2. Rimmed baking sheets. I say plural, because for one, the baking sheets I own are kind of like my apartment (small), and two, I know my bacon is sliced fairly thin so there’s far too many slices to fit on a single pan. If you have one of those hoity-toity baking pans that is big enough to fit all of them, then one is all you need. Be sure it’s rimmed and not just a flat cookie sheet…unless you enjoy grease fires or looking for a way to get a firefighter in your house. :::wink wink:::

3. Aluminum foil. This is for covering your baking pans and saving your delicate hands from dish soap.

4. Oven. (duh.)

Now that you have your supplies rounded up, here’s how you do it:

1. Do NOT pre-heat your oven. Don’t ask me why, just follow the directions.

2. Cover your pan(s) with aluminum foil. This is not completely necessary, but if you’re anything like me, you loathe washing dishes. This makes clean up a cinch.

Now, if you have one of those nice pans that is big enough to fit all the bacon, you probably won’t have a single sheet of foil to effectively cover the pan. Do not despair. Itssunnyinmysoul has a genius solution for you. I only just now thought of this, so I don’t have a photo to illustrate, unfortunately. Cut two pieces of foil, about 2 inches longer than your pans. Stack the two sheets on top of each other and fold over one of the long edges (fold both pieces together.) Do this a couple more times to ensure there isn’t grease leakage. Now you have a giant sheet of foil to protect your huge pan from having to be washed. You’re welcome.

3. Arrange your bacon slices on your covered baking sheets. Note: try not to overlap slices, as they will end up stuck together. However, if you’re trying to make a bacon flag or placemat…then overlap away!

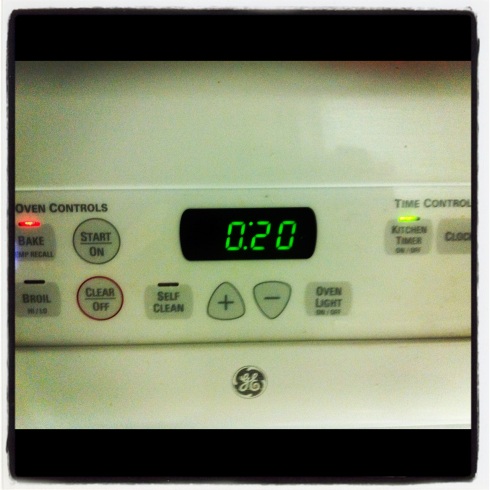
4. Place your bacon in your COLD oven. It is cold, right? Good. NOW you can heat your oven to 400 degrees F.

5. Set a timer for 20 minutes. Now, this is how long it should take to make your bacon perfectly crispy. Unfortunately, I have an electric oven, and it literally took almost the entire 20 minutes to heat to 400 degrees. Needless to say, my Huckleberry Hound of an oven took closer to about 30 minutes to make my bacon the way I like it. I would suggest checking your bacon at about 17 minutes to survey the damage progress, just to make sure it’s not burning already. (you might have a Speedy Gonzales type oven for all I know) Proceed accordingly.

6. When the 20 minutes is up check your bacon. If you like yours a little on the crispy side, and it looks like this (below), then congratulations, your bacon is done cooking.

Now, if you lined your pans with foil, and you’re not a bacon fat collector, pull off the foil and toss in the trash. Easy peasy bacon greasy.

7. Enjoy your bacon.

Voila! You have perfectly cooked bacon, aaaaand you didn’t have to wash the greasy mess of a pan you would have had to if you had cooked it like your momma taught you. Also, no grease spatters all over your stove. Win.

I hope you all enjoyed this week’s Wreck. I haven’t decided what next week’s will hold, so please feel free to leave suggestions in your comments 🙂

Drum Roll, Please…

7 Feb

There’s something super special looming on your horizon, a treat, if you will. It’s gonna be like getting a cupcake every week. Okay, so maybe I’m overselling it a smidge with the cupcake (let’s be honest, there isn’t a single blog post that could ever compare to a cupcake), I’m creating a new tradition here on ItsSunnyInMySoul!

I know a lot of really amazing people who don’t think they’re creative. My mother being one of them, which, if you see the things that she can do, is just a ridiculous statement. Being creative doesn’t necessarily mean you’re creating masterpieces that will be marveled at throughout the ages. Being creative, to me, means doing ordinary things in a not so ordinary way. See a recipe that you’d like to try? Try using it as a guideline to creating something all your own, instead of following the instructions step by step. Shake things up. Make whatever it is you do, yours.

In honor of this idea, I am re-naming Wednesdays. It sounds so…well boring and Wednesday-ish. The middle of the week will henceforth be known as…..wait for it…………..

 Wreck it Wednesdays!

Stay tuned for a new idea that will help you wreck that little shell you’re in.


(oh, I am so excited!!)